

atramentum luminis guide
Atramentum Luminis Guide: A Comprehensive Overview (Updated 04/29/2026)
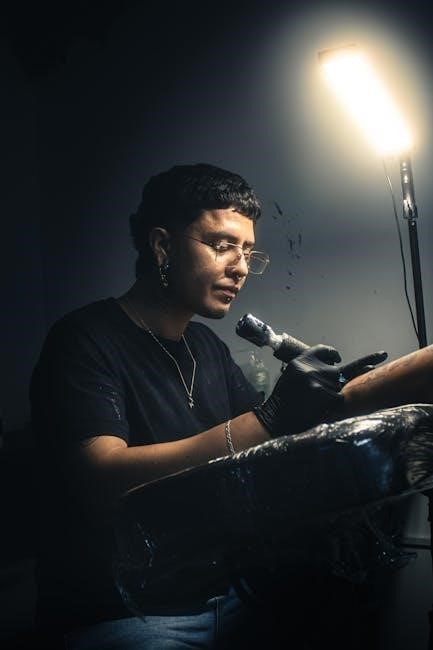
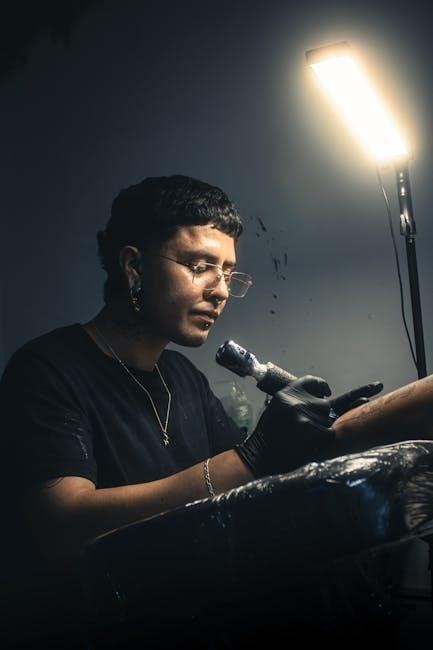
This guide, based on Felis’s work, details adding glows to eye textures within Final Fantasy XIV using Photoshop․ It’s a comprehensive walkthrough for modders!
What is Atramentum Luminis?
Atramentum Luminis, Latin for “ink of light,” is a popular technique within the Final Fantasy XIV modding community․ It focuses specifically on enhancing the visual appeal of character eyes by adding a glowing effect․ This isn’t a pre-made mod itself, but rather a method – a set of techniques – used to modify existing eye textures․
The goal is to create more expressive and captivating eyes, moving beyond the standard in-game appearance․ Modders utilize programs like Photoshop to achieve this, manipulating texture maps to simulate an internal glow․ This guide, inspired by Felis’s detailed instructions, will break down the process step-by-step, allowing you to customize your character’s gaze with stunning luminosity․
The Core Concept: Eye Mod Glow
The fundamental principle behind Atramentum Luminis is simulating an internal light source within the eye texture․ This isn’t about simply painting a bright color onto the iris; it’s about creating the illusion of luminosity․ This is achieved by carefully manipulating the texture’s color values and utilizing Photoshop’s blending modes․
The glow originates from the iris and subtly radiates outwards, affecting the surrounding sclera․ The key is subtlety and realism – a convincing glow appears natural, not like a harsh, artificial effect․ This guide will demonstrate how to layer effects and adjust settings to achieve a believable and visually striking result, enhancing character immersion․
Software Requirements & Setup
To begin creating Atramentum Luminis eye mods, you’ll primarily need Adobe Photoshop․ While other image editing software might be used, this guide focuses specifically on Photoshop techniques․ Ensure your system meets Photoshop’s minimum requirements for optimal performance․
Beyond Photoshop, you’ll require tools for importing and managing textures within Final Fantasy XIV, such as TexTools․ These tools aren’t covered in detail here, but are essential for implementing your finished textures in-game․ A basic understanding of file formats, particularly DDS, is also beneficial for a smooth workflow․
Photoshop as the Primary Tool
Photoshop stands as the cornerstone for crafting Atramentum Luminis eye mods due to its robust layering system and extensive filter options․ The software’s capabilities allow for precise control over color, luminosity, and texture – crucial elements for achieving realistic and visually appealing eye glows․
Its non-destructive editing features, like adjustment layers and smart objects, are invaluable for experimentation and iterative refinement․ Mastering Photoshop’s blending modes and masking techniques unlocks the full potential for creating captivating eye effects․ This guide assumes a foundational familiarity with Photoshop’s interface and core functionalities․
Essential Photoshop Versions
For Atramentum Luminis modding, Photoshop CC 2019 or later is highly recommended․ These versions offer full support for DDS (DirectDraw Surface) files, the standard texture format for Final Fantasy XIV․ Earlier versions may require plugins for DDS compatibility, potentially introducing complications․
While older versions can be used, newer iterations boast improved performance, refined tools, and enhanced stability․ Access to the latest features streamlines the workflow and allows for more complex and nuanced glow effects․ Ensure your system meets the minimum requirements for optimal performance with the chosen Photoshop version․
Understanding Eye Texture Basics
Successfully implementing Atramentum Luminis requires a grasp of fundamental eye texture components․ These textures aren’t simply color images; they’re comprised of several layers working in concert to create realistic visuals․ Understanding these layers is crucial for targeted modification․
Key elements include the diffuse map (base color), the normal map (simulates surface detail), and the specular map (controls light reflection)․ Manipulating these individually, and in relation to each other, allows for subtle or dramatic changes to the eye’s appearance․ Proper texture understanding prevents unwanted artifacts and ensures a polished final result․
Texture Resolution and Formats
Eye textures for Final Fantasy XIV typically utilize the DDS (DirectDraw Surface) format, optimized for game engines․ Common resolutions include 2048×2048 or 1024×1024 pixels, impacting both visual fidelity and performance․ Higher resolutions offer greater detail but demand more processing power․
DDS supports various compression methods; DXT5 is frequently used for textures with alpha channels (transparency), essential for realistic eye rendering․ Maintaining the original resolution and format is generally recommended to avoid compatibility issues or visual degradation․ Altering these requires careful consideration and testing․
Anatomy of an Eye Texture (Diffuse, Normal, Specular)
Understanding the components of an eye texture is crucial for effective modding․ The Diffuse map defines the base color and patterns of the eye․ The Normal map simulates surface details like bumps and ridges, adding depth without increasing polygon count․ Finally, the Specular map controls how light reflects off the eye’s surface, creating highlights and shine․
Modifying each map individually allows for nuanced control over the final look․ Glow effects primarily impact the diffuse and specular maps, enhancing brightness and reflectivity․ Correctly adjusting these elements is key to achieving a realistic and visually appealing glow․
Preparing Your Eye Texture for Modification
Before applying glow effects, proper texture preparation is essential․ Begin by importing the eye texture into Photoshop․ Layer organization is paramount; create separate layers for the iris, sclera, and any existing highlights․ This allows for isolated adjustments without affecting other parts of the texture․
Carefully isolate the iris and sclera using selection tools like the Magic Wand or Lasso․ Feathering the selections slightly creates smoother transitions․ Duplicating these layers provides a non-destructive workflow, enabling experimentation and easy reversion to the original texture․
Importing and Layer Organization
Initiate the process by importing your chosen eye texture directly into Photoshop․ Upon import, immediately establish a robust layer organization system․ Duplicate the base texture layer as a safety net, preserving the original․ Create new layers specifically for the iris, sclera, and any pre-existing highlights or details․
Naming these layers descriptively – “Iris_Base,” “Sclera_Base,” etc․ – enhances clarity․ Group related layers into folders for further organization․ This methodical approach ensures non-destructive editing, allowing for easy adjustments and experimentation throughout the glow effect creation process․
Isolating the Iris and Sclera
Precise isolation of the iris and sclera is crucial for targeted glow application․ Utilize Photoshop’s selection tools – the Lasso Tool, Magic Wand, or Pen Tool – to carefully outline these areas; Feathering the selection edges (1-2 pixels) creates a smoother transition, preventing harsh lines during glow application․
Once selected, create layer masks from these selections․ This non-destructive method allows you to refine the isolation without permanently altering the original texture․ Ensure the masks accurately represent the iris and sclera boundaries for optimal glow control and a realistic final result․
Creating the Glow Effect: Techniques
Achieving a convincing glow requires layering techniques within Photoshop․ Begin by duplicating the iris layer․ Apply a Gaussian Blur to this duplicated layer – a radius of 5-15 pixels is a good starting point, adjusting for desired intensity․ Experiment with Layer Blending Modes like Screen, Add, or Overlay to integrate the blurred layer seamlessly․
Screen brightens, Add creates a more intense glow, and Overlay offers a subtle, color-dependent effect․ Careful Color Selection is vital; choose hues slightly lighter and more saturated than the base iris color for a natural appearance․
Using the Gaussian Blur Filter
The Gaussian Blur filter is foundational for creating the glowing effect in Atramentum Luminis․ Accessed through Filter > Blur > Gaussian Blur, it softens and spreads the color, simulating light emission․ A Radius value dictates the blur’s intensity; lower values (3-7 pixels) produce subtle glows, while higher values (8-15 pixels) create more dramatic effects․
Experimentation is key! Preview the blur in real-time and adjust the radius until the glow appears natural and doesn’t overwhelm the iris detail․ Remember to apply this filter to a duplicated layer, preserving the original texture․
Layer Blending Modes (Screen, Add, Overlay)
Blending modes are crucial for integrating the glow seamlessly with the base eye texture․ Screen brightens the image, creating a light, airy glow – ideal for subtle effects․ Add intensifies brightness, resulting in a more vibrant glow, but can easily overexpose․ Overlay combines the glow with the underlying texture, offering a balanced effect that respects both colors and luminosity․
Experiment with each mode, adjusting layer opacity to fine-tune the glow’s intensity․ These modes interact differently with colors, so choose the one that best complements your desired aesthetic․
Color Selection for Realistic Glows
Realistic eye glows aren’t simply bright white; they reflect the character’s inherent eye color and surrounding light․ For natural looks, sample colors directly from the iris․ Slightly desaturate and increase the brightness for a believable glow․ Consider the character’s overall theme – warmer tones for fiery characters, cooler tones for icy ones․
Avoid overly saturated or contrasting colors, as they can appear artificial․ Subtle variations within the glow itself, using gradients, enhance realism․ Experiment to find hues that complement the existing texture!
Advanced Glow Techniques
Beyond basic blurring and blending, advanced techniques elevate Atramentum Luminis eye mods․ Gradient Maps allow nuanced color shifts within the glow, creating depth and visual interest․ Adding subtle noise mimics imperfections and prevents a sterile appearance․ Experiment with different noise types and amounts․
Outer Glow layer styles offer precise control over glow size, opacity, and color․ Combining these methods – gradients, noise, and outer glow – yields stunning, customized effects․ Mastering these techniques unlocks truly unique and captivating eye glows!
Gradient Maps for Color Variation
Gradient Maps introduce dynamic color shifts to your Atramentum Luminis glow․ Instead of a flat color, a gradient defines the glow’s hues across its intensity․ Create gradients with complementary or analogous colors for subtle or striking effects․ Experiment with different gradient styles – linear, radial, or angle – to shape the glow’s color distribution;

Adjust the gradient’s midpoints to control where colors transition․ This allows for realistic highlights and shadows within the glow․ Gradient Maps offer a powerful way to move beyond simple color choices and achieve complex, visually appealing results․
Adding Noise for Texture
Subtle noise enhances the realism of your Atramentum Luminis glow, preventing it from appearing overly smooth or artificial․ Applying a small amount of noise mimics the imperfections found in natural light sources․ Use Photoshop’s “Add Noise” filter, experimenting with the amount and distribution (Gaussian or Uniform)․
Keep the noise level low to avoid a grainy appearance․ Consider applying noise to a separate layer and blending it with the glow using a soft light or overlay mode․ This provides greater control over the effect’s intensity and integration with the underlying texture․
Utilizing Outer Glow Layer Styles
Photoshop’s Outer Glow layer style offers a convenient method for creating a pronounced Atramentum Luminis effect․ Adjust the blend mode, opacity, and color to achieve the desired intensity and hue․ Experiment with the spread and size settings to control the glow’s extent and softness․
Contour options allow for shaping the glow, while the range slider determines which tones are affected․ Use a subtle glow for natural looks, or increase the settings for dramatic, fantasy-inspired results․ Remember to refine the glow’s color to complement the character’s overall theme․
Specific Glow Styles & Aesthetics
Atramentum Luminis allows for diverse aesthetic choices in eye glow styles․ Subtle, natural glows enhance realism, mimicking faint light reflection․ Intense, fantasy-inspired glows create a magical, otherworldly appearance, perfect for unique characters․
Color-based glows are crucial for thematic consistency; match the glow to character outfits or elemental affinities․ Experiment with gradients for dynamic color shifts․ Consider the character’s personality – a gentle soul might have a soft, warm glow, while a fierce warrior could possess a vibrant, intense one․ Layer styles and blending modes are key!
Subtle, Natural Glows
Achieving subtle, natural glows in Atramentum Luminis requires restraint; Utilize low opacity layers with blending modes like ‘Screen’ or ‘Overlay’․ Focus on soft color palettes – pale blues, greens, or ambers work well․ A gentle Gaussian blur is essential for diffusion, avoiding harsh edges․
Avoid overly saturated colors; think of the natural luminescence of the eye․ Layering multiple, very faint glows can build depth․ The goal is enhancement, not transformation․ These glows should appear as a natural reflection of light, adding a touch of realism to the character’s eyes․
Intense, Fantasy-Inspired Glows
For dramatic, fantasy-inspired glows in Atramentum Luminis, embrace vibrant colors and higher opacity․ Experiment with blending modes like ‘Add’ for a brighter effect․ Utilize strong Gaussian blur radii to create a pronounced bloom․ Consider incorporating gradient maps for complex color shifts within the glow;
Outer glow layer styles can amplify the intensity, but use them judiciously․ Don’t be afraid to push boundaries – think magical energy or otherworldly power․ These glows should be visually striking, clearly indicating a non-natural source of luminescence․ Layering is key to achieving depth and complexity․
Color-Based Glows (Matching Character Themes)
Tailoring eye glows to character themes elevates Atramentum Luminis mods significantly․ Select colors complementing a character’s job, race, or personality․ For example, a mage might have cool blues and purples, while a warrior could sport fiery reds and oranges․ Gradient maps are invaluable for nuanced color transitions within the glow․
Subtle color variations enhance realism․ Consider the character’s overall aesthetic – a darker theme calls for muted glows, while a brighter one allows for bolder choices․ Consistency is crucial; maintain a cohesive color palette throughout the entire eye texture․
Troubleshooting Common Issues
Common problems arise when implementing Atramentum Luminis glows․ Harsh glows often result from excessive Gaussian blur radius or overly bright color choices; reduce these values for a softer effect․ Color bleeding and artifacts can occur due to improper layer blending modes or insufficient isolation of the iris and sclera․
Performance impact is another concern․ Complex glow effects can strain lower-end systems․ Optimize by minimizing layer count and using efficient blending modes․ Regularly test in-game to identify and address any visual glitches or performance drops․
Glow Appearing Too Harsh
A frequently encountered issue is an overly intense or “blown-out” glow effect․ This typically stems from an excessively high radius applied within the Gaussian Blur filter․ Reduce the radius incrementally, observing the changes in-game․ Additionally, the chosen glow color might be too bright; lower the luminosity or opacity of the glow layer․
Experiment with different layer blending modes – “Screen” or “Add” often provide more subtle results than “Overlay”․ Finally, ensure the base eye texture isn’t already overly bright, as this can amplify the glow’s intensity․
Color Bleeding and Artifacts
Color bleeding, manifesting as unwanted hues around the eye’s edges, can occur during glow creation․ This often results from insufficient isolation of the iris and sclera layers before applying effects․ Ensure precise masking to prevent color spill․ Artifacts, like pixelation or jagged edges, may arise from overly aggressive blurring or resampling․
Work with high-resolution textures and utilize anti-aliasing techniques within Photoshop․ Lowering the opacity of the glow layer can also mitigate these issues․ Regularly test in-game to identify and address any visual anomalies promptly․
Performance Impact of Glow Effects
Intense or overly complex glow effects can negatively impact game performance, particularly on lower-end systems․ Excessive layering and high-radius blurs demand more processing power․ Optimize your textures by balancing visual fidelity with performance considerations․
Avoid unnecessarily large textures or overly bright glow intensities․ Regularly test your mod on various hardware configurations to assess its impact․ Consider creating multiple versions with varying levels of detail to cater to a wider range of players․ Prioritize efficiency without sacrificing aesthetic quality․
Exporting and Implementing Your Mod
Once satisfied with your glowing eye textures, exporting them correctly is crucial․ Save your final texture as a DDS file – the preferred format for Final Fantasy XIV texture mods․ Ensure you select the appropriate compression settings (DXT5 is commonly used for textures with alpha channels)․
Utilize tools like TexTools to import the DDS file and package it into a mod archive․ Thoroughly test the mod in-game, checking for visual glitches or performance issues․ Iterate on your design based on in-game observations, refining the glow until it achieves your desired aesthetic․
Saving in the Correct Format (DDS)
Saving your modified eye texture as a DirectDraw Surface (DDS) file is essential for compatibility with Final Fantasy XIV․ Photoshop may require a DDS plugin to directly save in this format․ When saving, prioritize DXT5 compression, especially if your texture includes an alpha channel for transparency․
DXT5 offers a good balance between file size and image quality․ Avoid lossy compression methods that can introduce artifacts․ Carefully review the DDS save options to ensure mipmaps are generated correctly, contributing to a smoother visual experience within the game environment․
Importing into Texture Modding Tools (e․g․, TexTools)
Once your DDS file is prepared, you’ll need a texture modding tool like TexTools to integrate it into the game; TexTools allows you to unpack the game’s texture archives, replace the original eye textures with your modified version, and repack the archive․
Ensure TexTools is configured correctly to access your Final Fantasy XIV installation․ Carefully follow the tool’s instructions for importing and replacing textures, paying attention to file paths and naming conventions․ Back up original files before modification to easily revert changes if needed․
Testing In-Game and Iteration
After importing your modified textures, launch Final Fantasy XIV and test the changes in-game․ Examine the eye glow under various lighting conditions and character animations to assess its appearance․ Don’t hesitate to make adjustments!
Texture modding is often an iterative process․ Return to Photoshop to refine the glow effect based on your in-game observations․ Experiment with different blending modes, colors, and intensities until you achieve the desired aesthetic․ Save incremental versions of your DDS file to track progress․
Resources and Further Learning
For a detailed foundation, consult the XIVMods Guide by Felis, a cornerstone resource for Atramentum Luminis modding․ XIVMods provides comprehensive instructions and visual examples․
Engage with the Final Fantasy XIV modding community through dedicated forums and Discord servers․ These platforms offer valuable support, troubleshooting assistance, and opportunities to share your creations․ Explore tutorial videos and online resources to expand your knowledge and discover advanced techniques․ Continuous learning is key to mastering eye texture modification!
XIVMods Guide (Felis’s Guide)
Felis’s guide on XIVMods is the definitive starting point for Atramentum Luminis․ It meticulously breaks down the process of adding glows to eye textures, utilizing Photoshop as the primary tool․ The guide offers clear, step-by-step instructions, accompanied by illustrative images, making it accessible to both beginners and experienced modders․
It covers essential aspects, from understanding eye texture anatomy to mastering advanced glow techniques․ This resource is regularly updated and serves as a central hub for all things Atramentum Luminis, ensuring you have the latest information․
Community Forums and Discord Servers
Engaging with the Final Fantasy XIV modding community is invaluable for Atramentum Luminis․ Several forums and Discord servers are dedicated to texture modding, offering a space to ask questions, share creations, and receive feedback․ These platforms provide a collaborative environment where you can learn from experienced modders and troubleshoot issues․
Active communities often share custom resources, tips, and tricks not found in written guides․ The XIVMods guide often links to relevant community hubs, facilitating connection and knowledge exchange amongst enthusiasts;
Tutorial Videos and Online Resources
Visual learners will benefit from the numerous tutorial videos available online demonstrating Atramentum Luminis techniques․ Platforms like YouTube host content covering everything from basic Photoshop skills to advanced glow effect creation․ Searching for “FFXIV eye texture modding” or “Atramentum Luminis tutorial” yields relevant results․
Beyond videos, websites and guides, such as the XIVMods guide by Felis, offer detailed written instructions and visual examples․ These resources complement the core guide, providing alternative explanations and approaches to mastering eye glow modification․